So, you want to learn how to script in Roblox? You’ve come to the right place! My name is Kushal, and I’ve been scripting on Roblox since 2016, about 9+ years of experience. I’ve also been teaching people how to script through my YouTube channel script_ing, where I break down scripting concepts in a simple and fun way.
This guide is designed for absolute beginners—you don’t need any coding experience to follow along. By the end of this article, you’ll understand the basics of Roblox scripting and be able to write your first script!

What is Roblox Scripting?
Why Do We Need Scripts?
Roblox games aren’t just built with parts (like blocks, spheres, and models). They’re brought to life using scripts, which are lines of code that tell the game how to behave.
For example:
- A door that opens when a player walks near it? Scripted.
- A shop where players can buy items? Scripted.
- A zombie NPC that chases players? Scripted.
Without scripts, a Roblox game would just be a static world with no interaction.
Scripts make games fun and dynamic!
What Programming Language Does Roblox Use?
Roblox uses Lua (specifically, a modified version called Luau).
Lua is one of the easiest programming languages to learn because:
✅ It’s beginner-friendly.
✅ It has simple syntax (rules for writing code).
✅ It’s used in many games, not just Roblox.
Even if you’ve never coded before, learning Lua will help you understand programming concepts that apply to other languages like Python or JavaScript!
Getting Started with Roblox Studio
Before writing scripts, you need to install Roblox Studio. This is the official development software provided by Roblox, where you can create, edit, and test your games.
Roblox Studio is an app that Roblox provides Roblox developers with to create awesome games.
Luckily for you, I have a tutorial on where you can find Roblox Studio and download it. You can click here to learn about how to download it here.
Awesome!
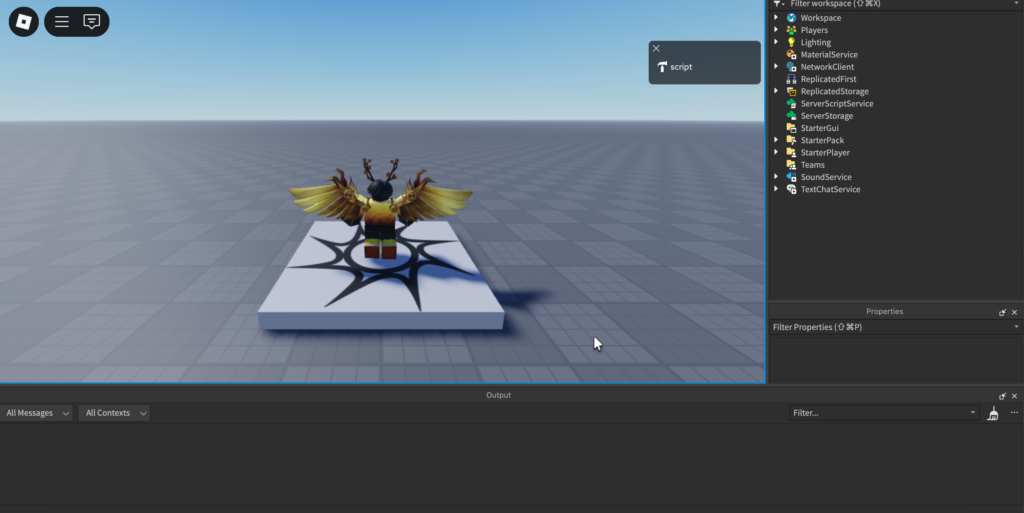
At this point, you should be on the Baseplate.

The Baseplate is the new game template that Roblox provides us with.
It contains a SpawnLocation (that light gray thing with the spiral design), which is the place where players can spawn.
And it also contains the Baseplate itself (the GIANT dark gray checkerboard thing).
Now, you should make sure that you can see the Explorer and Properties windows inside of Roblox Studio.
You can learn more about the Explorer window here and the Properties window here.
Running Your First Roblox Script
Alright, let’s write our first script!
Step 1: Insert a Script
Let’s start with inserting a script.
We’re going to insert our script into ServerScriptService, as ServerScriptService is where Roblox stores and runs all of our scripts.
- In the Explorer panel, hover your mouse over ServerScriptService
- Click the plus sign
- Search for Script
- A new script will appear inside ServerScriptService
- You should automatically see it, but incase you don’t, double click the Script in the Explorer

By default, it contains this line:
|
1 |
print(“Hello, world!”) |
Step 2: Run the Script
Now, before you run the script, let’s make sure you can see the output.
The Output is a window inside of Roblox that Scripts can write to.
If you can’t see the Output, that’s okay!
Just follow this tutorial:
- Go to VIEW on top
- Find the Output button (it’s a tiny logo)
Now, you should be able to see the Output.
All that’s left is to test our game.
So, just click the “Play” button (blue triangle at the top).
If everything works, you should see "Hello world!" appear in the Output window.
🎉 Congrats! You just ran your first Roblox script! Woohoo! 🎉
Now, that’s fun and all, but you didn’t really have an opportunity to write your first lines of code.
So, let’s get started with writing your first line of code.
Writing Your First Roblox Script
Let’s start by stopping the testing session by clicking on the red square.

Now, you should find yourself staring at the print("Hello, world!") again.
Just in case you don’t, you can double click the Script in the Explorer.
Okay, okay.
Now, let’s get started actually writing the first piece of code.
Step 1: Write the Instance.new Code
Replace the print("Hello, world!") with this line:
|
1 |
Instance.new(“Part”, workspace) |
Here’s what everything means line by line:
Instance.new – This means “Okay Roblox, I want you to create something for me”
"Part" – This means “The thing you will be creating is a Part.”
"workspace" – This means “I want you to put the Part in Workspace”
Now, if you’d like to learn more about Workspace, you can read more about it here.
So, all together:
|
1 |
Instance.new(“Part”, workspace) |
This line of code just means: “I want to put a new Part inside of Workspace.”
Super simple!
Step 2: Run Your Script!
The next step is to actually run your script.
To do so, once again, just look for the blue play button and click it to test your game.
Now, at this point, you should be confused, because you told Roblox to add a new Part into Workspace.
But where in the world is that part!?

At this point, a lot of beginners give up.
But don’t let that be you!
Here’s the kicker:
The Part that you created is actually UNDER the SpawnLocation!
Step 3: Remove the SpawnLocation
Since this SpawnLocation is being a very bad object and hiding our Part, let’s remove it altogether.

Inside of the Explorer, click on the arrow next to the Workspace, so that you can see all of the contents inside Workspace.
And look for the SpawnLocation.
Once you’ve found it, click it.

And then, click on the delete button on your keyboard.
Alternatively, you can right click the SpawnLocation and click “Delete.”
From there, you should be able to see….

Your Part!
🎉 Congrats! You just wrote your first Roblox script! Woohoo! 🎉
Making Something Interactive: A Part That Changes Color
Now, let’s make our Part change color, because the current gray color is kind of bland.
Once again, you can stop your testing session by clicking on the red square.

Alright, back to our Script.
Once again, you can double click on your Script in the Explorer if you’ve lost the Script contents.
Now, we’ve told Roblox “I want you to add a new Part and put it inside of Workspace”, but how can we tell it “I want that Part to be a specific color.”
It’s pretty simple!
Step 1: Using a Variable for the Part
Change your code to this:
|
1 |
local part = Instance.new(“Part”, workspace) |
It looks pretty similar to what we had before, right?
Except now, we told Roblox “I want you to create a new Part and put it inside of Workspace, and I want to nickname that Part to part.”
So, that’s what that local part is about.
It’s essentially saying “I want to give that new Part I created a nickname called part“
Step 2: Changing the Part’s BrickColor
Now, in Roblox, one way of changing the Color of a Part is by changing its BrickColor.
In the video above, inside the Properties window, you can see that the Part has a property called BrickColor.
And what we have to do is tell Roblox “I want to change its BrickColor.”
One of my favorite colors is red (the other is black), so let’s start by changing the BrickColor to red.
|
1 2 |
local part = Instance.new(“Part”, workspace) part.BrickColor = BrickColor.Red() |
By giving the Part a variable called part in line 1, in line 2, we’re able to tell Roblox “Remember that Part I created? The one whose nickname is part? I want that part‘s BrickColor changed to Red.”
Simple enough, right?
Step 3: Test Your Game
Now, if you test your game out…

Ah, whoops.
We have to delete the SpawnLocation!
But after we’ve deleted it..

It’s red!
🎉 Congrats! The Part is Red! Woohoo! 🎉
Step 4: Changing the Color After 5 Seconds
Awesome. Now, let’s see if we can get the Part to change its color to a completely different color after 5 seconds.
Once again, click the stop button to stop your game.
For us to tell Roblox “Change the color to a different color after 5 seconds”, we’ll need a way of telling Roblox “Wait 5 seconds.”
You can do this by using task.wait(5).
That line basically tells Roblox “Wait 5 seconds before doing anything else.
|
1 2 3 |
local part = Instance.new(“Part”, workspace) part.BrickColor = BrickColor.Red() task.wait(5) |
So now, we’ve told Roblox:
- “Create a new Part and put it inside of Workspace”
- “Change that Part’s BrickColor to Red”
- “Wait 5 seconds”
And the last step is to tell Roblox to change the color to something else.
I’ll change it to Black.
|
1 2 3 4 |
local part = Instance.new(“Part”, workspace) part.BrickColor = BrickColor.Red() task.wait(5) part.BrickColor = BrickColor.Black() |
You can change it to whatever color you’d like, as long as Roblox’s autocomplete allows you to, as you can see from the video below.
My final code looks like this:

Step 5: Remove the SpawnLocation Permanently
We’ll need to remove the SpawnLocation before we can test our game, otherwise we won’t be able to see the color change because we’ll be too busy removing the SpawnLocation.
Last time we removed the SpawnLocation while we were still testing our game.
But the issue with doing that is that once we stop our game, the SpawnLocation will still be there, because things you do while you’re testing your game don’t affect the game itself. Removing the SpawnLocation while testing the game is a temporary change.
So this time, while you’re not in testing mode, you can go into the Explorer and remove the SpawnLocation.
This way, the SpawnLocation removal will be permanent, and we can test out our game without having to remove it every single time.
Step 6: Test Your Game
And we’re done!
Now, you’re free to test your game.
After 5 seconds, your Part’s color will change.
What’s Next?
You did an awesome job following this tutorial, and I hope it helped.

If you enjoyed the way I explained everything line by line, I know for sure you’ll enjoy my book, the Beginner’s Guide to Roblox Scripting, which you can get your own copy of by clicking me.
There are also more tutorials on this blog for you to browse.
A good one to continue with is this article on how you can script your very own kill brick.


